
“I tried to update the firmware of my Rockspace wireless range extender but it went in vain. Why am I facing this issue despite setting up the Rock space WiFi extender properly? Is there a hack following which troubleshooting this issue is possible?”
The answer to this question of yours is yes. You can easily troubleshoot this issue by restoring your Rockspace wireless range extender to its default factory settings. Now, you might be wondering how to do Rockspace extender reset. Well for that, you need to refer to the steps given in this article. Here, we have talked about two different methods through which you can reset your Rockspace range extender. Thus, read on.
Rockspace Extender Reset via Reset Button
You will be able to restore your wireless range extender by pressing the Reset button if you walk through the step-by-step instructions mentioned in this section:
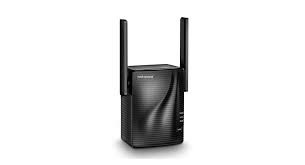
- Look at all sides of your Rockspace wireless extender.
- On one of the corners, you will be able to locate the Reset button.
- Once you do, press it.
- You need to hold on for some time.
Right after Rockspace extender reset, you need to reconfigure your Rockspace range extender by accessing the http re rockspace local web page. What is that? If you are not able to take your brain down the memory lane as to how the extender can be set up, then the user manual will be your knight in shining armor.
Rockspace Extender Reset via Web User Interface
Another way through which Rockspace extender reset is possible is by accessing the web user interface of your device. To learn how to execute this process with ease, here are the guidelines you need to walk through:
- First of all, access a power socket and connect the extender to it.
- Do not forget to power up the extender.
- Connect the existing router to the extender.
- We would suggest that you use a wired source for that.
- Open an internet browser on your computer.
- Type the default web address in the URL field.
- Press the Enter key.
- On the login screen, enter the login credentials.
For your information, if you are not sure of the credentials of your Rockspace extender, take the help of the ones mentioned in the Rock space WiFi extender manual.
- Hit Log In.
- Once the Rockspace extender setup wizard, appears, go to Settings.
- Click on the Reset option.
- For confirmation, hit the Yes button.
- Apply the changes.
- Hold on for some time.
Before you can even bat an eye, your Rockspace wireless range extender will get restored to its default factory mode. After that, you already know what to do. You need to perform Rockspace extender setup using the rockspace local login details.
If you want to avoid the hassle of performing the setup process on your own, refer to the steps mentioned in the following section.
How to Perform Rockspace Extender Setup?
- Turn on the extender after plugging it in.
- Connect the extender and router and hold on for some time.
- Open up a web browser on your system.
- Access the re.rockspace.local page.
- Enter the login credentials.
- Hit Enter.
- Soon the setup wizard will appear.
Follow the on-screen instructions given on the Rockspace extender setup wizard to complete setting up your Rockspace range extender. If you want, you can also set up your device using the WPS method.
Wrapping Up
This is all about how you can perform Rockspace extender reset using two different methods. You will easily be able to restore your device to the factory default settings using these instructions.
Whether you liked reading this article or not, it is recommended that you share your feedback via the comment section. Surely your fellow readers will appreciate it.
